Mastering Effective 3D Printing Design Tips
- Jun 11
- 3 min read
3D printing transforms ideas into tangible objects. To get the best results, you must master effective design principles. This process requires understanding the technology’s limitations and strengths. By applying clear design strategies, you can create parts that are functional, durable, and visually appealing.
Essential 3D Printing Design Tips
Start with the basics. Knowing the key design tips helps you avoid common pitfalls and improve print quality.
Understand printer capabilities: Different 3D printers have varying resolutions and build volumes. Design within these limits to avoid failed prints.
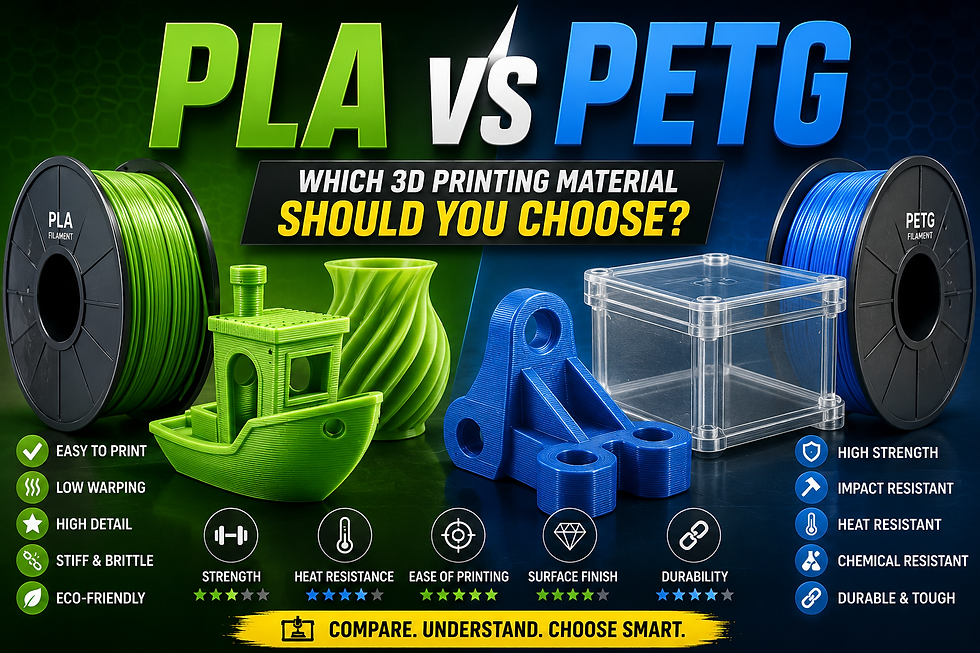
Consider material properties: Each material behaves differently. For example, PLA is easy to print but less heat resistant, while ABS is tougher but requires a heated bed.
Use appropriate wall thickness: Thin walls can break easily. A minimum of 1-2 mm thickness is usually safe, but check your printer’s guidelines.
Design for support removal: Overhangs greater than 45 degrees often need supports. Design parts so supports are easy to remove without damaging the print.
Incorporate tolerances: If parts must fit together, leave small gaps (usually 0.1-0.3 mm) to account for printer accuracy.
These tips help you create reliable and functional prints. They also reduce wasted time and materials.

How to Optimise Your 3D Models for Printing
Optimising your 3D models is crucial. It ensures your design prints correctly and performs well.
Simplify geometry: Complex shapes increase print time and risk errors. Use simple, clean geometry where possible.
Check for manifold errors: Your model must be watertight with no holes or non-manifold edges. Use software tools to repair these issues.
Orient parts strategically: Position your model to minimise supports and improve surface finish on visible areas.
Add chamfers and fillets: Sharp edges can cause stress concentrations. Rounded edges improve strength and print quality.
Use infill wisely: Adjust infill density based on strength needs. Higher infill means stronger parts but longer print times.
By following these steps, you improve print success and part durability.
Where can I design my own 3D printing?
You have many options to design your own 3D models. Choose software based on your skill level and project needs.
Beginner-friendly tools: Tinkercad offers an easy drag-and-drop interface for simple designs.
Intermediate software: Fusion 360 provides powerful CAD features and simulation tools.
Advanced options: SolidWorks and Rhino are ideal for complex engineering parts and professional use.
Open-source alternatives: Blender and FreeCAD offer free, versatile modelling capabilities.
Many of these programs support exporting files in STL or OBJ formats, which are compatible with most 3D printers. You can also find online platforms that combine design and printing services.
Common Design Challenges and How to Overcome Them
Designing for 3D printing comes with challenges. Knowing how to address them saves time and resources.
Warping and shrinking: Use heated beds and enclosures to reduce warping. Design with uniform wall thickness to minimise shrinkage.
Layer adhesion issues: Improve adhesion by adjusting print temperature and speed. Avoid sharp corners that cool too quickly.
Support removal damage: Design with minimal overhangs or use breakaway supports. Consider soluble supports for complex parts.
Print orientation effects: Orientation affects strength and surface finish. Test different angles to find the best balance.
Overcomplicated designs: Simplify parts to reduce print time and failure risk. Break large models into smaller, printable sections.
Addressing these challenges early in the design phase leads to better outcomes.
Bringing Your Ideas to Life with 3D Printing
To turn your concepts into reality, focus on the entire process from design to final print. Use the right tools and follow best practices. Remember to test prototypes and iterate designs based on print results.
You can enhance your workflow by collaborating with experts who understand both design and manufacturing. They can help optimise your files and select suitable materials. This partnership ensures your parts meet functional and aesthetic requirements.
For those looking to deepen their skills, explore resources and communities dedicated to 3D printing. Continuous learning helps you stay updated on new techniques and technologies.
Mastering effective design for 3d printing opens up endless possibilities. It empowers you to create customised solutions that meet specific needs efficiently.
By applying these practical tips and strategies, you improve your chances of success in 3D printing projects. Focus on clarity, precision, and testing to achieve high-quality results every time.


Comments