Case study · Jewellery · CAD for CNC machining
A graduation signet ring, designed for CNC machining
The client didn't need a 3D print. They needed a 3D model detailed and clean enough to machine a single ring on CNC — so every engraved line mattered more than printability.
A personal ring with an institutional emblem
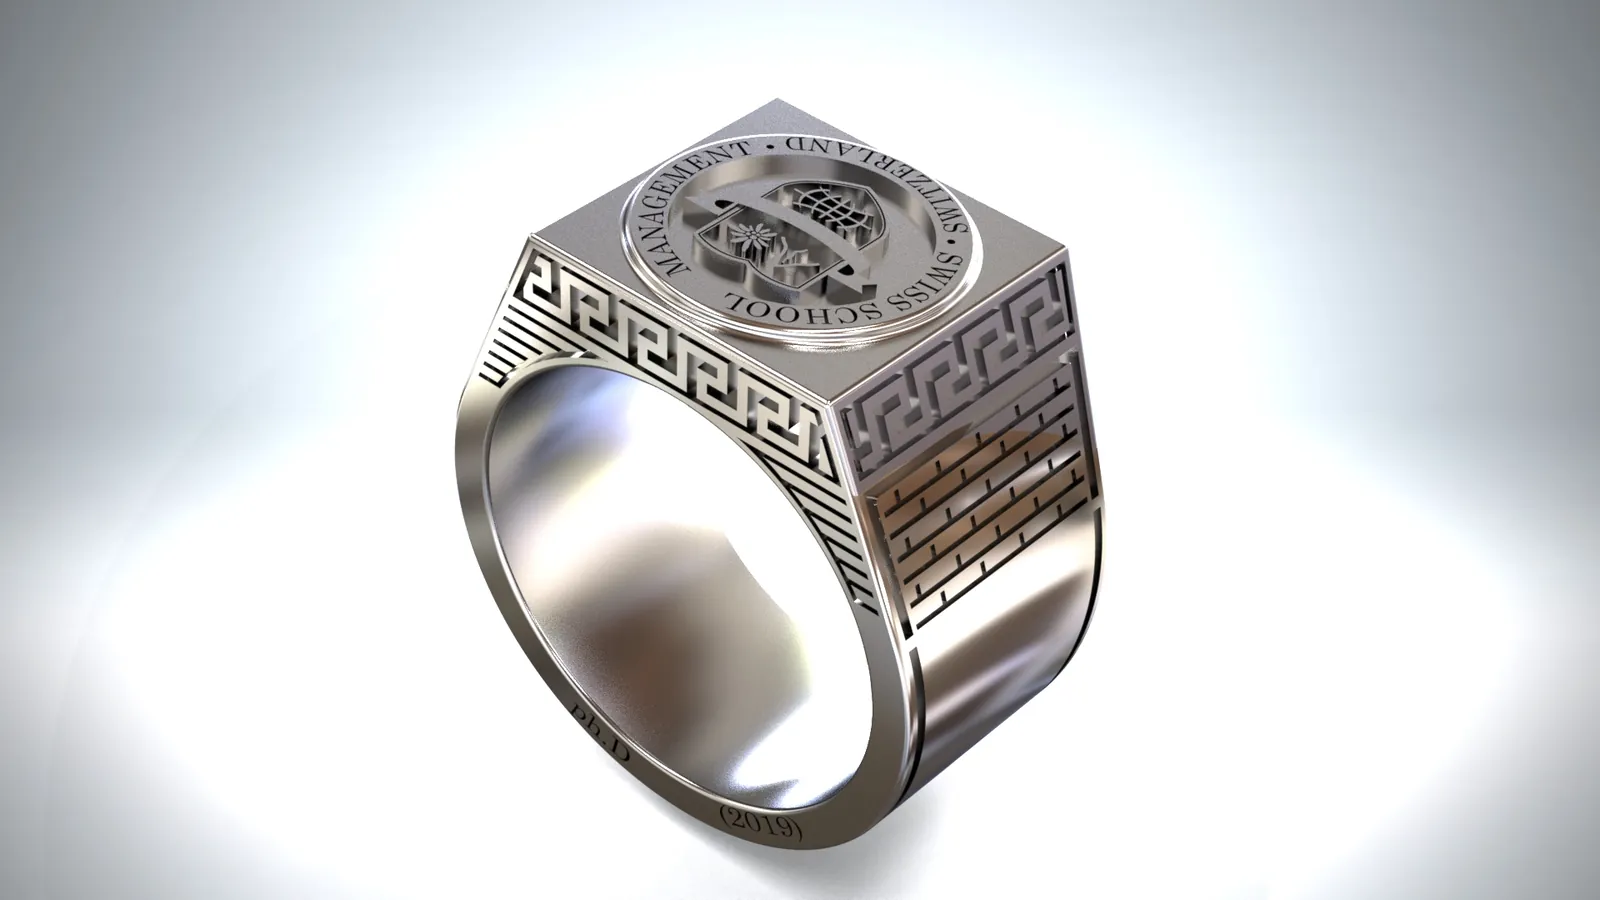
The client wanted a ring to mark a PhD — the shank carries the engraving Ph.D (2019). They sent a photo of a ring whose style they liked: a square signet top, Greek-key (meander) borders and brick-pattern shoulders. The request: keep that character, and replace the emblem on top with the logo of the Swiss School of Management.
The goal was not a 3D printed part. The client planned to manufacture one ring by CNC machining, so the deliverable was the design itself: an accurate, clean solid model that a machinist could program directly.
The client's reference photo isn't shown on this page: the image belongs to its owner.
Detail first, printability second
When a part is 3D printed, the design rules revolve around layers, overhangs and supports. For a single machined ring those rules don't apply. What matters instead is whether a cutter can reproduce every detail: the depth of each relief, the space between lines, and whether every surface can be reached by the tool.
That shifts where the effort goes. Instead of adapting the shape to the printer, the work goes into geometry precise enough that nothing is lost between the screen and the metal.
Key dimensions — measured from the final model
Turning a colour logo into height
The school's logo is a full-colour badge. On a metal ring there is no colour: detail only exists as height, edges and the shadows they cast. So the emblem was rebuilt as a layered relief — the raised rim and lettering around the edge, and the shield at the centre — with each element on its own level and height steps between 0.1 and 0.6 mm.
The challenge is scale. The whole emblem sits on a 13.8 mm face, yet it has to stay recognisable while every line remains large enough to machine. Getting that balance right is what separates a model that looks good on screen from one that survives the cutter.
Patterns that wrap the whole ring
Around the emblem, the style of the reference ring was carried over and adapted to the new proportions:
- Greek-key borders framing the sides of the head.
- Brick-pattern shoulders and fine line patterns leading into the band.
- Engraved text on the shank, including Ph.D (2019).
Every pattern is real geometry, not an image wrapped onto the surface. That matters for machining: CAM software creates toolpaths from the solid itself, so whatever is modelled is what gets cut.
A model ready for the machinist
The client received the final 3D model as a STEP file — a single closed solid with all engravings modelled — together with a render of the finished design.
The project shows the other side of our CAD work: not every part we design is meant for a 3D printer. When the manufacturing route is CNC, the model is built around the cutter instead of the printer, and detail becomes the priority.
Services behind this project
Need a CAD model ready for machining?
Send a sketch, a reference photo or a logo. We turn it into a clean, detailed 3D model your machinist can program directly.
Request a quote →